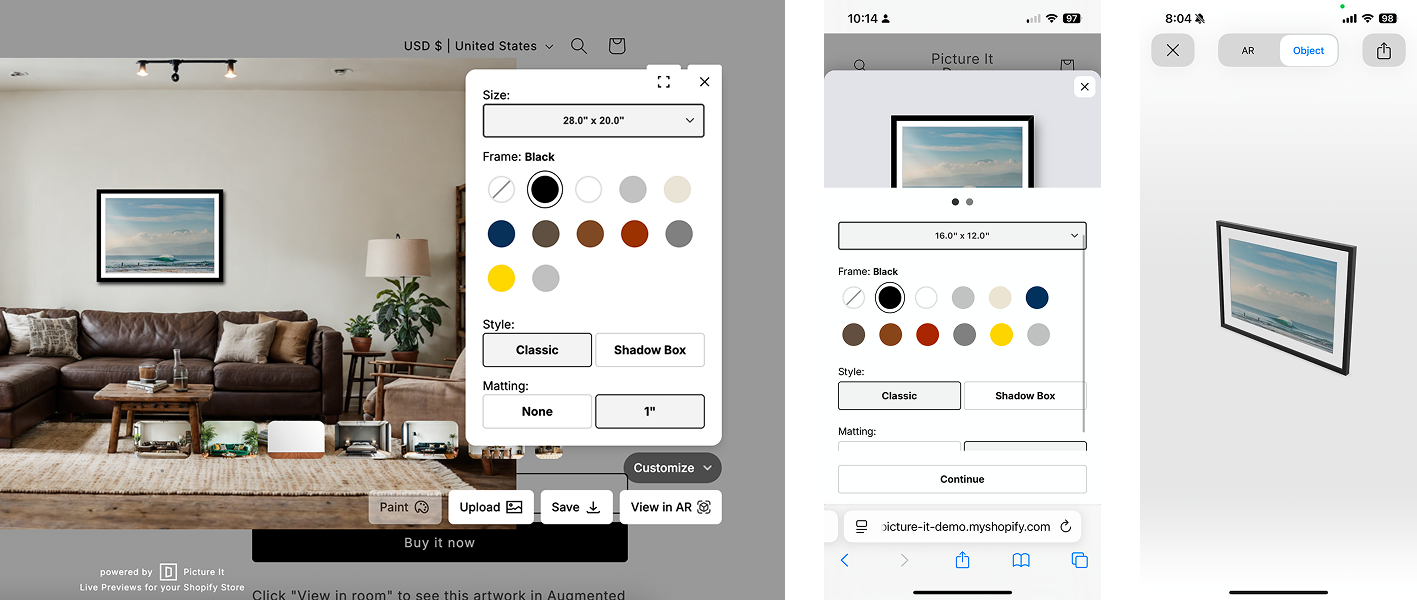
Auto-Framing lets you take your product image and automatically place it into a 3D product with frames. This means your product's main parent image (which you can customize) will be used, your variant's dimensions will be imported, and your customers can select how to display those with frames of your choosing.
There are two ways to set up Auto-Framing, individually as you activate your products, or globally across all your activated products.
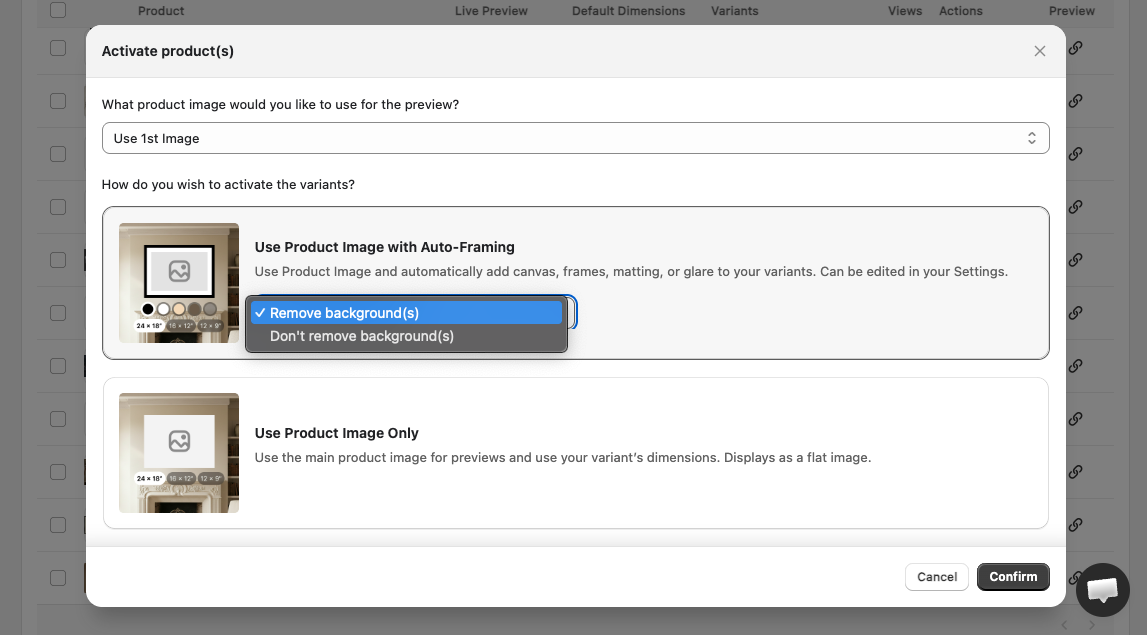
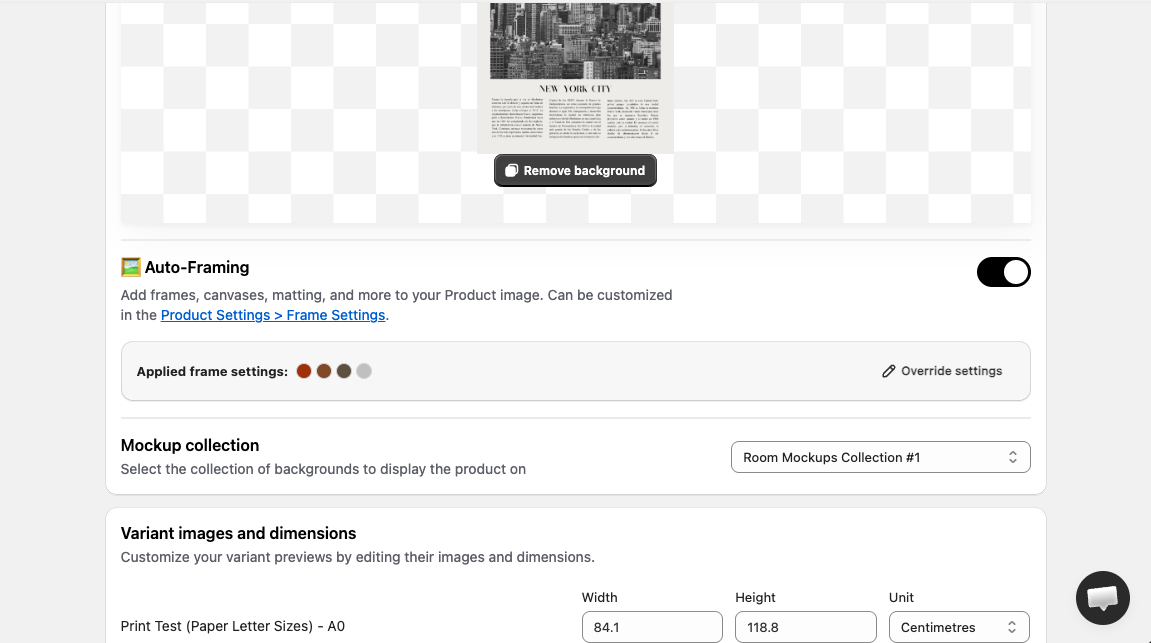
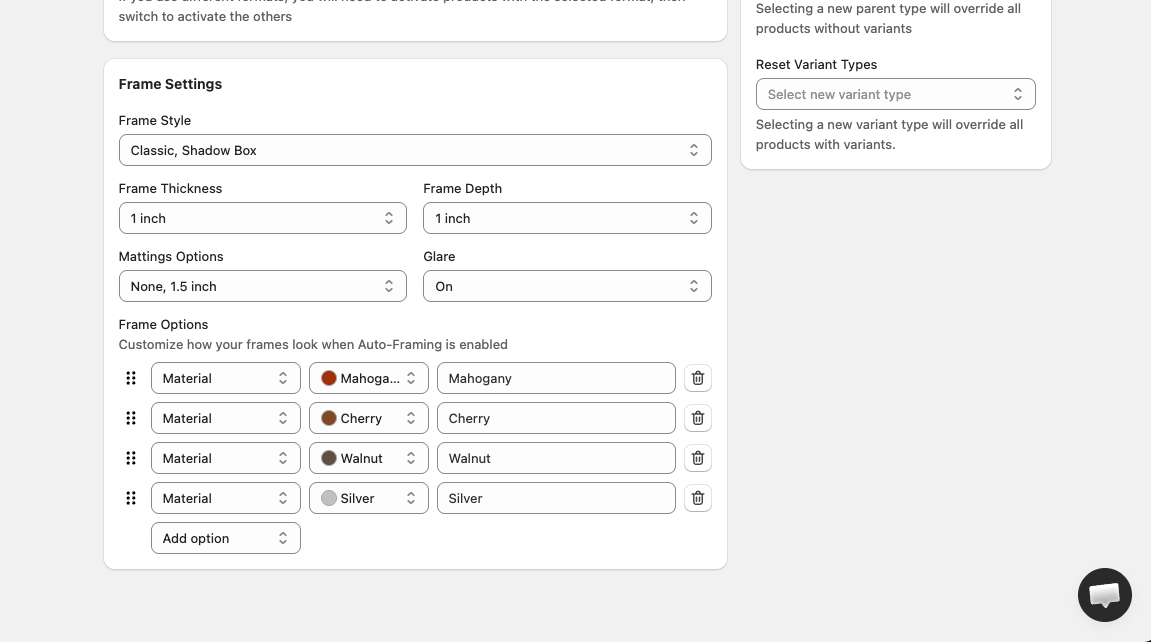
When Auto-Framing is enabled, you can override the frame settings set on that product. Frame Settings can be configured globally in Product Settings > Frame Settings.
Now for the fun part! You can customize what options you want to provide for framing and matting, as well as if you want a glare or not:
Just simply edit these in the Settings, and make sure to save!:

Install Picture It for a 14-day free trial, cancel anytime.